Fool of a Cook

If more of us valued food and cheer and song above hoarded gold, it would be a merrier world. – J.R.R. Tolkien

If a hobbit had a lumberjack to dinner…

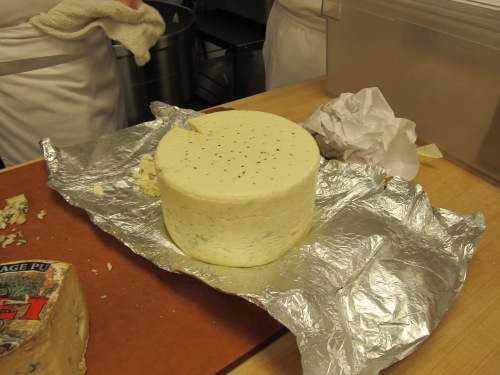
There are three great breakfasts in the world. In the U.S., it is fluffy waffles, scrambled eggs with hot sauce, and sausage. In Japan, it is miso soup, rice, pickles, and seaweed. And in culinary school, it is cheese. I walked into the bakeshop and ten cheeses stared me in the face, with ten more to come. There was imported Comté and Colby with cumin made by students in the program. There was Rogue Creamery Smokey Blue, one of the most bizarre cheeses I’ve eaten. It was the wide consensus that Roth Käse’s Buttermilk Blue was the best, with its long veins of Penicillium roqueforti and its tang and crumble. It was also agreed that it would make an excellent wedding cake, tall and round and white.

Roth Käse Buttermilk Blue

Roth Käse Buttermilk Blue

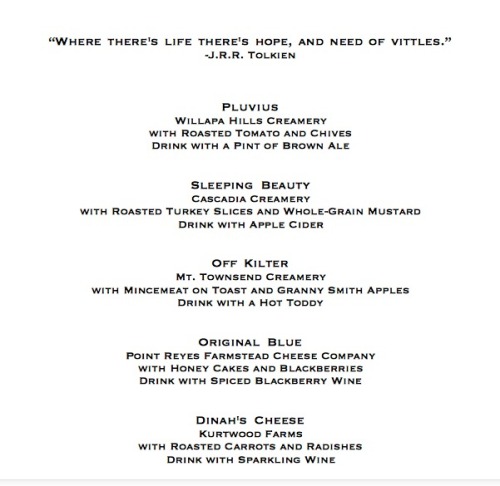
As part of the pastry program, we also learn about cheese. The pastry chef in a restaurant is usually expected to put together the cheese menu. Our assignment in our theory of fermentation class was to assemble a cheese menu, complete with food and beverage pairings. We had to be specific in our cheese choices. A pairing of Cheddar and apples was not acceptable, but a Cabot Clothbound natural-rind Cheddar with Jonagold apples would be excellent. A theme also added to the fun.

It may be obvious from the title of this blog, but I am a fan of Lord of the Rings. After I selected my cheeses I needed a way of binding them together. Naturally, hobbits came to mind. Hobbits surely appreciate the earthiness of cheese, and know how to pair it. I took my cues from them. It also didn’t hurt that Chef A is a definite Lord of the Rings fan, and would like the approach. (In the narrow pathway between the kitchen and the freezer that nobody is allowed to walk through, there is a still from the first Lord of the Rings movie of Gandalf, shouting “YOU SHALL NOT PASS!”)

Cheese Menu

Cheese Menu

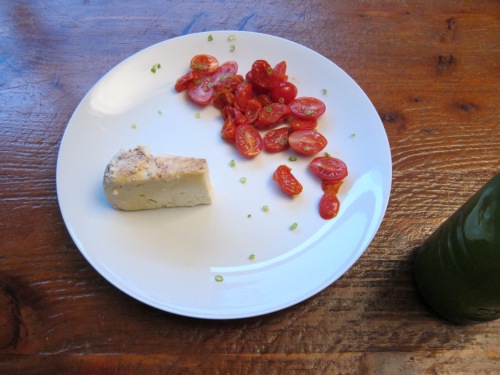
The first cheese is Pluvius by Willapa Hills Creamery. It is produced in the same way and with blue cheeses, but is not inoculated with the blue mold. As it ages inwardly, the outer portion has the tang and flavor of blue cheese, but without the moldy deliciousness. The interior has a similar texture and flavor as a mild feta.

Willapa Hills Pluvius

Willapa Hills Pluvius

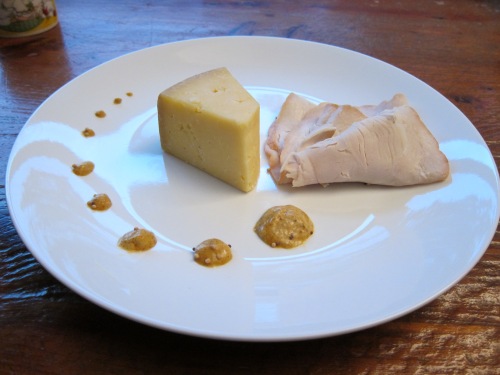
The next cheese is the Sleeping Beauty from Cascadia Creamery. It reminded me of an adult version of the cheese I had on turkey sandwiches as a child. While it has a bit of a gritty texture, the flavor is pleasant and subtle and very hobbity.

Cascadia Creamery Sleeping Beauty

Cascadia Creamery Sleeping Beauty

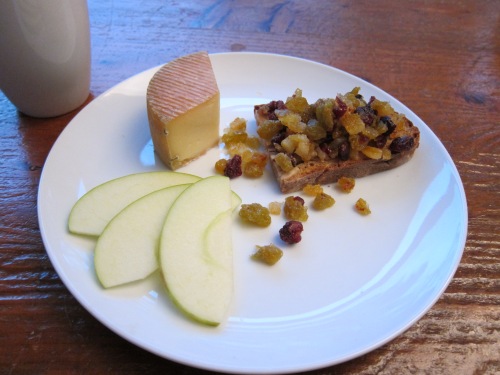
The third cheese is Mt. Townsend Creamery’s Off Kilter. It is a medium soft cheese that is washed regularly in Kilt Lifter Ale from Pike Brewery. The flavor is good, but it is the smell I love. It was described as “tasting like a lumberjack smells”, but I think it also smells a bit like a recently washed lumberjack, or maybe a cigar in a pine forest before it’s set everything on fire. In pairing it, I imagined what a hobbit would feed a lumberjack after a long day’s work.

Mt. Townsend Creamery Off Kilter

Mt. Townsend Creamery Off Kilter

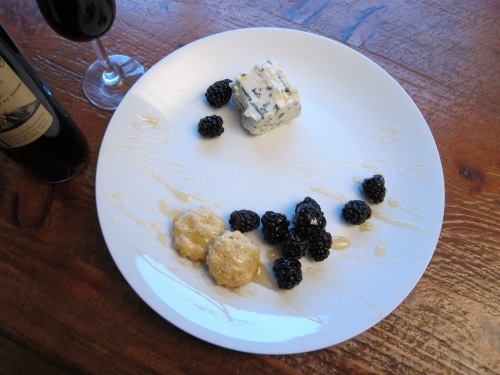
The fourth cheese is Point Reyes Farmstead Creamery’s Original Blue. It is a very blue blue, not restrained in any way. The cheese begins production no more than three hours after the cows are milked, so it retains an extraordinary flavor. It is not for blue cheese wimps, and the flavor can linger for hours, but it is absolutely worth it. The Original Blue is also far less crumbly than most blues, almost as spreadable as a chèvre. Blackberries and blue may sound absurd, but try it.

Point Reyes Original Blue

Point Reyes Original Blue

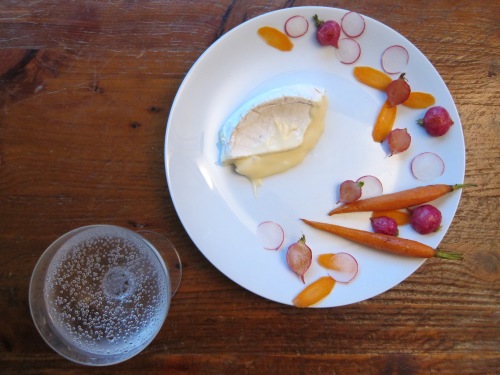
My final cheese is a heavenly Camembert-style cheese named after the first cow that made the milk for it. Kurtwood Farm’s Dinah’s Cheese is oozy and sweet and salty and beautiful. About three hundred wheels are produced a day by Kurt Timmermeinter, by hand and by himself. The result is so great I licked the plate, several times.

Kurtwood Farms Dinah's Cheese

Kurtwood Farms Dinah’s Cheese

The week of our cheese presentations was a week of the best breakfasts of my life. Most of my classmates brought in at least one sample of a cheese they were presenting. Despite the occasional sandy-rinded or bitter as pith cheese, most were at least good and at best revelatory. It’s hard to beat a culinary school breakfast.

Planning a Menu

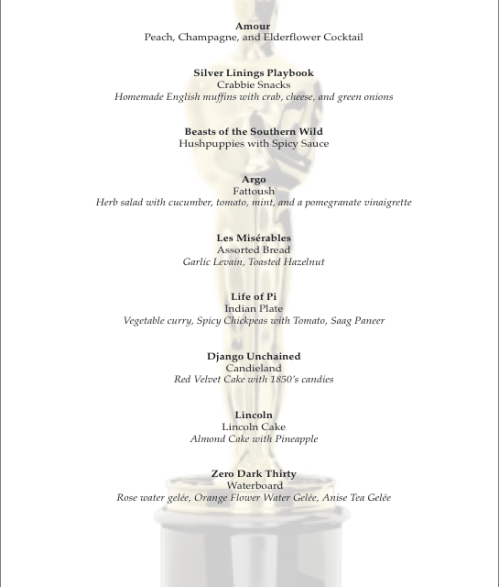
2013 Academy Awards Menu

2013 Academy Awards Menu

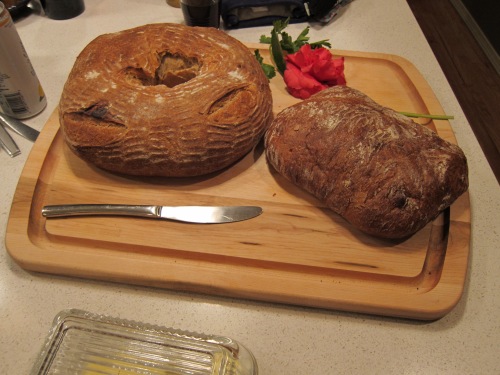
I love food, and I love stories. A time for stories opulent and overdramatic or expressive beyond their size is at the Academy Awards. For the past three years, I have watched nearly every movie nominated for an Oscar. While not every one is great, or even good, they are usually worth seeing for one reason or another. However, there are few things I can do without involving food. I soon decided to have an Oscar party, and created a menu for it. Each Best Picture nominee has one dish, based on a food eaten or referenced in the movie, or relating to an incident or theme in the movie. Much of the fun is organizing the dishes into a coherent menu. While it is relatively easy to come up with a dish for each movie, it is harder to create a meal with reasonable proportions of appetizers, main courses, and dessert. This year was particularly fun because I liked most of the Best Picture nominees. Most years there is a movie or two I love, a few that are good and worthy of nomination, and most that are overrated and not very good (as you may be able to tell, I am very critical of movies). I almost uniformly liked every movie this year, and so enjoyed watching each movie for food-related trivia. The one movie I didn’t like, Les Misérables, I simply bought bread.

Roasted Garlic Levain and Toasted Hazelnut Bread

Roasted Garlic Levain and Toasted Hazelnut Bread

The most popular dish was based on Silver Linings Playbook. Throughout the movie, the mother of the main character offers people crabby snacks and homemades. After extensive Googling, it was established that homemades are not anything in particular, but crabby snacks are a delightful combination of crab, cheese, and various flavorings melted on top of English muffins. I made English muffins from the Tartine Bread recipe, and modified the recipes for the toppings (replacing bottled liquid cheese with melted mozzarella and cheddar). The result was ooey-gooey, slightly crisp, and a little bit spicy snacks, perfect as appetizers when cut into quarters.

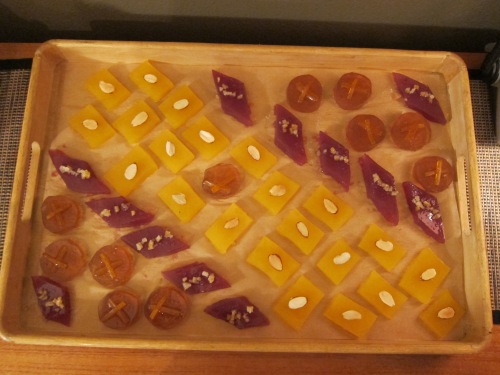
The most politically incorrect dish, and the one that I am most proud of, is the one created for Zero Dark Thirty. The movie is about the process of finding and killing Osama bin Laden, and there was a lot of controversy surrounding its depiction of torture. While it would have been easy to do a Middle Eastern dish of some kind, Argo was also set in a similar area, and I didn’t want to be repetitive. As I was considering my cheese project for class, I began to mentally assemble a cheese board. It suddenly struck me; what about a water board? The idea just wouldn’t leave, so I soon developed the idea of using rose water and orange flower water in gelées (basically fancy, homemade Jello) instead of cheese on a board. Gelées are not particularly hard to make, and can be made in nearly endless flavors.

Waterboard with Rose Water, Orange Flower Water, and Anise Tea Gelée

Waterboard with Rose Water, Orange Flower Water, and Anise Tea Gelée

The dish that was not perfect, but I would be most excited about experimenting with, was hushpuppies. In Beasts of the Southern Wild the six-year-old protagonist was named Hushpuppy. I expected that hushpuppies, like every fried food I’ve made before, would be a laborious process. I made about fifty fried fritters in an hour, and they were not only delicious fresh, but after being reheated in the oven hours later they were as crisp as ever. Hushpuppies are fried balls of cornmeal with buttermilk and some baking powder and soda for fluffiness. Mine were flavored with onion and paprika, but they can also include anything from peppers to crab. The two most common sauces they are served with are a spicy mayonnaise-based sauce or a honey sauce. Because they are simple to make and fun to eat, it would be very fun to experiment with various fillings and spices and sauces.

Creating menus is one of my favorite activities, and I love that the Oscars have built in limits on how crazy I can be. Usually the hardest part of planning a menu for an event is narrowing down what to make. Four course teas and six-dish Wednesday dinners are not unheard of. My recipe collections and databases are overflowing. If I can take advantage of a ready-made theme like Oscar Best Picture nominees, bring it on.

The Fool

Pigs

Future Serrano Ham

Future Serrano Ham

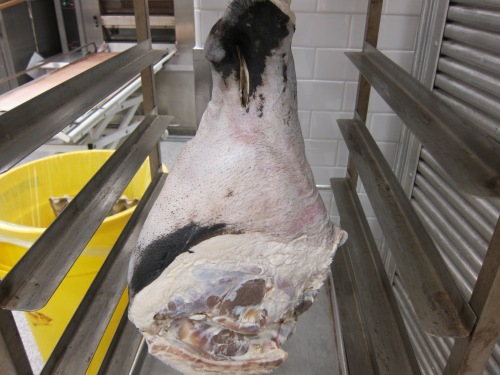
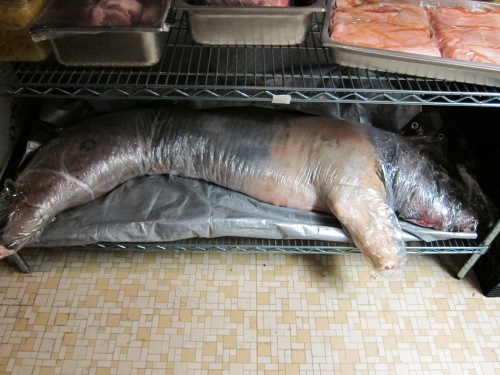
As I walked into the refrigerator to put away some cheese, a half a pig stared back at me from a cart, congealed blood dripping from its nose. I very calmly walked out, and the pig was wrapped in Saran wrap and tucked away on a bottom shelf by the time I came back. This did not stop Chef A from dancing over and exclaiming excitedly, “there’s a pig in the fridge!” Two days later, the pig had been butchered and another student was giving a pig haunch a salt rub down in order to produce a Serrano ham. The ham sits in the salt for several weeks, and then is hung up to dry for several more in our cheese room. I will let you know how the ham turns out; it will definitely be used on focaccia, in a tart, or in some other savory pastry before I finish school.

The Pig in the Fridge

The Pig in the Fridge

After the meatiness of the bread rotation, I moved onto the sweetness of cakes. While we do learn how to make intricately layered European-style cakes, they start us off on American layer cakes and pound cakes.

German Chocolate Cake

German Chocolate Cake

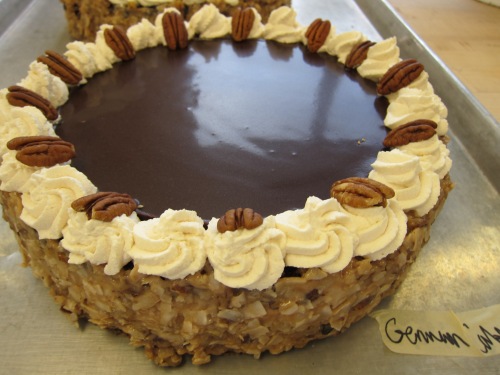
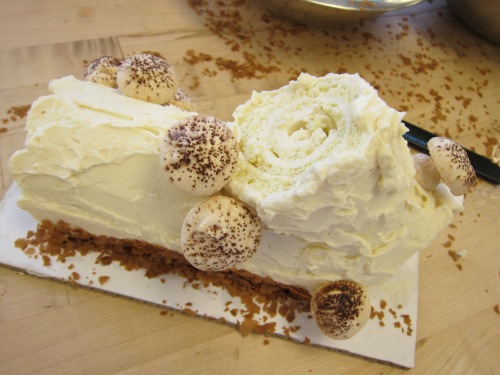
Two of my favorites to make were the outstandingly retro German chocolate cake (named after the person who invented it, not the country of origin), and the one that reminded me very much of Julia Child, the very French and very Christmassy bûche de Noël. I am planning on making a bûche de Noël for New Year’s, and will go over the process in detail.

Maple Vanilla Büche de Noël

Maple Vanilla Bûche de Noël

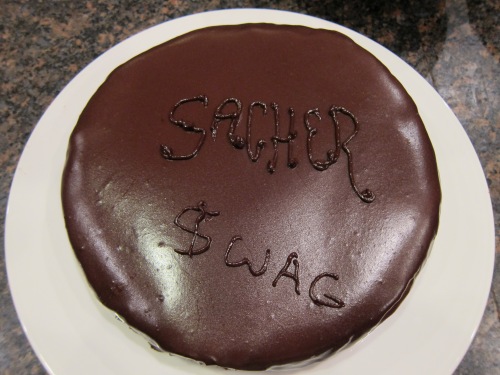
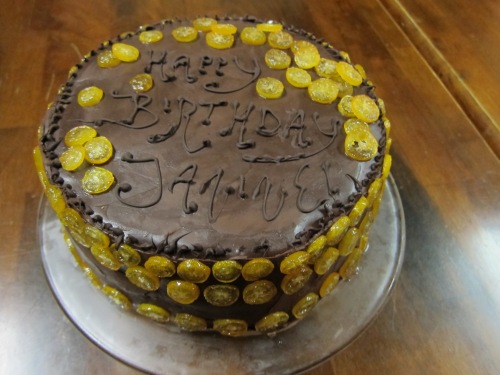
During that time I also had the opportunity to make two birthday cakes, a Sachertorte and a kumquat-caramel-chocolate cake of my own invention.
The Sachertorte is of Austrian origin, created for a prince by one of two hotels. They are currently in hot dispute over which actually created it. It is made up of two thin layers of dense chocolate cake, soaked in Kirsch (cherry) flavored simple syrup, spread with apricot jam, and covered with one layer of chocolate ganache and one layer of Sacher glaze, a mixture of chocolate, cream, and butter. Traditionally, the word “Sacher” is written in chocolate on the finished cake. The fifteen-year-old I made the cake for got his hands on the chocolate writing cone before I took a picture of the cake, so his version also included the word “swag”.

Swag Sachertorte

Swag Sachertorte

The other cake was layers of light orange sponge, candied kumquats, Grand Marnier caramel mousse, and Grand Marnier ganache. Candied kumquats sounded unique and fun before I made the cake, but I would not recommend them to anyone. While they are cute, it is hugely time-consuming to thinly slice each fruit and remove the multitude of tiny seeds without utterly destroying it.

Candied Kumquat and Chocolate Cake

Candied Kumquat and Chocolate Cake

I enjoyed my cake rotation. While breads and doughs were fascinating, and Chef A is one of the sweetest people (if you don’t get on his bad side), the bread side of the kitchen is relatively isolated from the rest. Our cake table is right next to my classmates making endless Christmas cookies, as well as a lot of Hannukah cookies. Chef C was on a Hannukah roll, and blue and white Stars of David, menorahs, and dreidels were flying out of the kitchen. Chef C also noticed that I often do a small dance when I do something well, and, after a particularly nerve-wracking extraction of cake from Bundt pan, said “you did good on that! Why aren’t you doing your happy dance? Do your happy dance!”

The Cake Table

The Cake Table

I also enjoyed being next to Chef F’s table of tarts. He was sick for almost my entire tart rotation (the reason I didn’t cover tarts here much), but he liked to take a look at everything that is going on in the sweet section of the kitchen. While he can be critical, he definitely helped me out when I did something in an ineffective way. I also learned that he likes a joke. He is notorious for stealing meringue mushrooms at Christmastime, and we made a tray full for our bûche de Noël. We were instructed by Chef C to not let Chef F anywhere near them. However, Chef F requested a few one day and Chef C said that was fine. I looked in the drying cabinet where baked meringue was stored and they weren’t there. I looked in the refrigerator as a last resort (meringue cookies should never be in the fridge) and there they were, squishy and dripping crystallized sugar. I brought the tray out to Chef F, and after a few harrowing minutes found out that Chef F had put them there himself because, and I quote, “I like to see you sweat”. Fortunately, the most sweaty part of the incident was cleaning the gooey meringue off the Silpat they were on.

I have a few events coming up, and I will share many recipes from those. For now, I would like to share the all-purpose ganache (gah-nosh is the closest pronunciation, but add a little bit of an “a” sound into the “nosh”). I use it on many cakes, and it can be used as a chocolate sauce, as a coating for cookies, or whipped up with butter or cream to make a chocolatey frosting. It also has the benefit of sounding fancy and French, even though it is amazingly easy to make. It is easy to add flavoring of any kind, stirring in a tablespoon or two of alcohol, a little vanilla, or even infusing the cream with spices or herbs.

Ganache

Ingredients

Equal amounts by weight or volume of heavy cream and finely chopped chocolate.

Place the chocolate in a heatproof bowl. Bring the milk to a simmer (small bubbles will appear, but it will not look like simmering water. If you dip a finger in, the cream should be very hot and you shouldn’t be able to hold it there). Pour the cream over the chocolate and let sit for a minute or two. Stir the mixture until all the chocolate is melted and combined. At first it will look like the chocolate will not be mixed in with the cream, but keep stirring. Once the mixture is fully combined, add any flavorings. If the ganache is combined, but there are still chunks of chocolate, put the ganache in a pot on the stove on low heat and stir until all the chocolate is melted.

Once the ganache is cooled some but still pourable it can be spread over a cake.
To harden ganache, refrigerate it. It will get harder at room temperature, but only refrigeration will harden it completely. It can be stored in the fridge for at least a week.
To reheat ganache place it in a bain-marie (a bowl of water over a pot containing about an inch of simmering water, also known as a double boiler), or reheat it in the microwave, stirring often.

In Need of Vittles


I love Thanksgiving. I am aware of the negative history associated with it, but the holiday as it stands now is my favorite. I love that it is all about food. I love that there is no gift giving involved, besides sharing food with family, friends, and everyone else who appears in my vicinity within a month or two of the holiday. I love finding new recipes to make for Thanksgiving, and the delight on the faces of my Thanksgiving regulars when they see our (relatively new) classics on the table, and spoon heaping piles onto their plates before cascading the food mountains with Niles of gravy. My father passed the Thanksgiving turkey baton to me this year as well. Though I had roasted chickens before, I searched out all turkey-related advice I could find. My father suggested rosemary and garlic in the cavity, and plenty of butter on the outside. Bon Appétit detailed a delicate glaze of mirin and soy sauce that I inelegantly poured over the top of the turkey, creating a good flavor, but some unsightly burned bits on the skin. My culinary teacher recommended a lemon in the cavity to increase moistness in the meat and add some subtle flavoring. After learning how to de-bone a turkey from a family friend, so that it could be grilled for his Thanksgiving, I received my final piece of advice. I roasted my turkeys breast side down so that the juices would run down and keep the white meat moist, instead of being subjected to the most intense heat. This way, they needed no basting and still turned out golden brown. After all, few people can really tell which way is the right way up, especially when a bird is surrounded by all sorts of delicious nibbles.

Though I cannot say Thanksgiving went off without a hitch, and it certainly would not have been as delicious or beautiful without our lovely, practical, co-chef, it was successful. Over years of producing elaborate menus for large groups of people I have learned a few tips to make them run, if not smoothly, at least pothole free.

I always make sure to have every recipe I plan to use in one place, including adjustments for serving size or other changes I made. This is helpful both for myself so I do not have to run around looking for what I need and in case I delegate a certain dish to someone else. They can follow the recipe without my worrying much about it turning out wrong.

I also like to run through the cooking process for each dish, making sure I will have enough oven, stove, and fridge space for each dish at the right time. Anything I can make ahead I do. In the case of Thanksgiving, this means I have a binder with each recipe, cooking schedule, shopping list, and other notes I need up to the serving point of each dish.

The thing I have the most trouble with is the menu itself. I tend to make too much food. I do not make too much of each dish, but I make more dishes than are necessary. Instead of browsing Facebook I browse Food & Wine, and find recipe after recipe I want to try. And I want to try them now. The wisdom of having a few well-matched recipes prepared perfectly as opposed to a cornucopia of commonplace cooking is apparent, and much harder than it sounds. My only advice, the same that rarely succeeds on myself, is to remember that there will be more Thanksgivings and more opportunities to make all the wonderful dishes in your recipe files. Unless, of course, the world ends this winter. My only sorrow then will be that my Christmas cookies were never finished.

Cocktail Bar

I cannot give you Thanksgiving leftovers or Christmas cookie assortments in person, but my urge to share food does not slow until January or so. I will have to share food with you through the intricately webbed paths of the Internet, via recipe. Probably the two most important dishes at Thanksgiving are stuffing and gravy. Though my versions are not perfect, they are tasty and satisfying for anyone from an enthusiastic teenage eater to a health conscious butter-phobe (not that I skimp on the butter on Thanksgiving). I also believe that both stuffing and gravy are not eaten enough during the rest of the year. They are perfect accompaniments to roast chicken, fall vegetables, or really anything. Stuffing uses up any old bread staling up on the counter, and stock for gravy can be made any time from animal bones and frozen for ages.

The Fool

Stuffing

Makes one 9×13 baking pan

Ingredients:

Two medium loaves bread
One large yellow onion
Three celery ribs
Butter or oil (for richer stuffing use up to one stick butter)
Two tablespoons (about) assorted minced herbs like rosemary, thyme, sage, etc.
Two cloves garlic, minced (optional)
Two cups stock (about)
Two eggs

Tear bread into crouton-size chunks. Either put in a bowl or bag to dry for several days f spread in a single layer on a baking sheet and dry in a 350˚F oven for about fifteen minutes. Make sure the bread is dry all over but not burned.

Roughly chop the onion and celery. Sauté the onion, celery, and garlic in butter or oil until softened. Stir in herbs and season with salt and pepper. Cool slightly and mix in with the bread chunks in a large bowl. Add the stock slowly and mix, until all the bread chunks are softened and squishy, but there is little stock not absorbed. You may not need two cups of stock, and may need more. Go by the feel of the softened bread instead of the measurements. Mix in the eggs.

Spread the stuffing in the baking pan and cover with tin foil. It can be refrigerated at this point for a day. Bake, covered, at 350˚F for 40 minutes, and then remove the foil. Continue baking uncovered for 15 to 25 minutes, until the top is crusty and the stuffing is warm all the way through. The USDA recommends baking stuffing made with poultry stock to an internal temperature of 165˚F, and these baking times should allow it to reach that temperature. Serve warm with gravy.

Notes:

Using flavored bread such as roasted garlic or rosemary adds depth of flavor.

Bread ripped into chunks allows the stock and flavors to be more fully absorbed, but cutting the bread into chunks is also acceptable.

The stuffing can be baked until the point when the foil is removed, and then refrigerated for a day. The next day it can be baked, uncovered, until it is warmed all the way through.

Stock for gravy:

The standard ratio for making stock is 8 pounds bones:1 1/2 gallons water:1 pound mirepoix (a mix of 50% onion, 25% carrot, and 25% celery). The bones are browned in a 425˚F oven for about 90 minutes, until they are dark on every side. Be sure to turn the bones occasionally. The bones, cold water, and mirepoix are then placed in a stockpot along with a teaspoon or so of peppercorns and about a tablespoon of coarse kosher salt. The stock is then boiled at a low temperature for 2 ½ to three hours, cooled, and the solids strained out. Be sure to skim the white foam that appears off the top of the stock. If too much is left the stock will be bitter. The finished stock can be refrigerated for about three days and frozen a year or so. I like to freeze my stock flat in Ziploc bags in two cup quantities. The bags are easily stacked and quickly thawed. Just make sure each bag is labeled with the date and type of stock.

Besides this basic recipe there are many other ways and tips for making stock:

Be sure to use cold water, and even a few ice cubes, when making stock. This lets the flavor be extracted more slowly and prevents bitter impurities from taking over the flavor.

The bones do not need to be browned, but the stock will be a lighter color and slightly less flavorful.

I also keep a bag of frozen vegetable scraps and will put these in stock. Parsley stems, leek ends, mushrooms, parsnips, and a few other vegetable bits add more flavor to stock.

For clearer stock, the strained stock can be run through a strainer covered with cheesecloth to remove more bits.

Beef, chicken, and turkey bones all make excellent brown stock. If making stock with fish or shellfish scraps, do not brown them.

The technique for vegetable stock is basically the same, except browning the vegetables is optional and should be done in a dry pan or pot, not the oven. I find mushrooms, especially a few ounces of dried porcini, add the most flavor to vegetable stock. Ginger, soy sauce, and lemongrass can be added to vegetable stock for a different flavor profile.

For gravy:

Gravy can be thickened with either roux or cornstarch. Make sure the stock you are using for gravy is at least at room temperature before thickening.

Roux is a cooked mixture of flour and fat, usually butter. Melt the butter and then whisk in the flour. It will turn into a paste. The longer a roux is cooked the darker it will become. The darker a roux gets the more flavor it has and the less thickening power it has. For gravy I tend to use a lighter roux because the stock should have plenty of flavor. For roux I use the ratio of 1 ounce (2 tablespoons) butter:1 ounce (2 tablespoons) flour. I thicken each cup of stock with one ounce of roux. After the stock is added to the roux, or vice-versa, whisk until the gravy begins to thicken. At this point it should be seasoned with salt or pepper and drippings from a chicken or turkey, herbs, and any other flavorings can be added. Roux can also be made, frozen, and reheated.

For gravy made with cornstarch I would generally add more flavorings to the finished gravy. A slurry (a mixture of liquid and cornstarch) must be made before the cornstarch is added to the stock because, unlike roux, it does not dissolve evenly in liquid and can be lumpy. For every two cups of stock I would use about one tablespoon of cornstarch whisked in and dissolved in about ¼ cup stock. The slurry is then whisked into the stock and whisked until thickened. Again, at this point, season with salt and pepper, and add any other flavorings.
D’ough!

Brioche

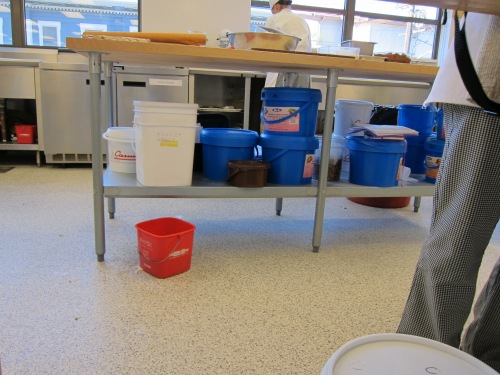
During the earthquake drill today I realized how impractical kitchens are during earthquakes. Ten of us huddled in the doorway, right under a ceiling-high rack full of muffin tins, brioche molds, and kugelhopf pans. Hiding under the tables was impossible, since each table has about eight enormous bins of various flours stored underneath. Several people were too busy to bother hiding, and continued to happily slice their bread. As I think it over, the best places to hide would probably be the big walk in fridge, since most of the heavy stuff is on the lower shelves and it has plenty of food, or in one of the person-sized ovens, if it was turned off. It speaks for the dedication and mild insanity of pastry chefs and bakers that, were it an actual earthquake, our first thoughts would be for the safety of our mousse cakes and almost done pain au lait rolls, and second for ourselves.

Flour under the table

Because I have yet to get my recipe book for doughs and breads, and because we use a lot of specialty equipment in the dough rotation, I will wait to post any dough recipes until I have time to test them in a home kitchen. I’ll post my peanut butter cup pie recipe as consolation for the lack of sticky bun recipes.

Contents of my knife bag

On foodie reality television and in culinary magazines we hear a lot about knife bags and knives. Pastry chefs do carry around a few knives, but our bags have a much bigger variety of tools.

My knives are among my favorite tools. They’re cool and sharp and a little bit intimidating and help me make it to lunch when they stop serving food in fifteen minutes and I have twelve apples to peel and dice. My white plastic bowl scraper is the most useful one dollar tool I’ve ever bought. It gets all the sticky dough bits out of the bottom of a 20-quart mixing bowl. It allows me to play race cars while cleaning the dough sheeter (an awesome piece of equipment I’ll try to get some pictures of). And, if you don’t mind getting your hands dirty, it’s an amazing spatula. Its surface area and relatively sharp edge makes smoothing out cold caramel or mixing pastry cream and hazelnut filling easy. My mini offset spatula is great for scooping, spreading, and prying sticky rolls out of pans. I love it already, and am sure I will love it more once I start my cake rotation.

My favorite tools

We all walk around with a thermometer and a Sharpie in our pockets. The thermometer is useful, though not necessary most of the time. The Sharpie is fantastic. Everything that goes in the fridge gets labeled, so we can tell one ganache from another and which egg whites are up for grabs. We also use it to write labels when we send goodies down to the pastry case. At home I find myself grabbing at my upper arm, expecting to find a pen there. I am, unfortunately, disappointed. However, the labeling can be a little odd. Chef C showed everyone in the kitchen the container marked “2nd quarter H2O”. My other favorite tool are my scales. Very few things can be accurately measured by volume, water, milk, and eggs being the notable exceptions. Everything else we weigh. I am always happy not to have to use one of the school’s scales, and am in high demand with classmates who have not yet purchased their own. It is accurate down to one gram.

My big offset spatula is great for spreading big swaths of filling or ganache on doughs and cakes. It is important to have the proper spreading technique, using long strong wide movements. One of the culinary chefs came up to a classmate the other day and said, “you have excellent spreading technique.” My smaller spatula is good for all sorts of stuff on the stove, from poaching pears to making caramel. The best thing is that the caramel comes right off. We use our pastry brushes all the time. Unfortunately, the bristles on mine occasionally come out, but there’s nothing better for perfectly coating a cake pan with melted butter. We don’t use our measuring spoons a lot, but once in a while the 1/8th teaspoon comes in handy for measuring out minute quantities of yeast. A bench scraper is what we use to clean floury surfaces, cut up dough to be weighed out, and other general helpfulness.

I do have other tools, but I haven’t used them much yet. The most important thing is in a busy kitchen any tool you want to keep should be marked. I bought some distinctive duct tape and put a piece on each of my tools. When all the dishes are on a big drying rack and anyone can come take them away, making sure your tools are identifiable is very important.

I start my tart rotation this week, and will hopefully be able to provide you with foolproof crust tips and tricks, as well as delicious recipes. I’m sure Chef F would be shocked at one of his students making a pie, let alone one with peanut butter (since he despises it), but I think peanut butter cups are delicious and should be made into a full sized dessert.


Peanut Butter Cup Pie Recipe

Makes one eight to ten inch pie

Ingredients:

21 cream-filled chocolate cookies, like Oreos

3 1/2 tablespoons melted unsalted butter

1/2 stick softened unsalted butter

5 ounces bittersweet chocolate chips or finely chopped chocolate

1/2 cup + 1/3 cup heavy whipping cream

3/4 cup peanut butter

1/2 cup powdered sugar

1 peanut butter cup, plus any for garnish

1/3 cup crushed peanuts, plus any for garnish

Flaky salt and additional whipping cream, for garnish


Crush cookies to crumbs in a food processor. Add melted butter to the crumbs until they are moist. Press the crumbs into an eight to ten inch pie plate or tart pan, making sure to press them up the edges. Refrigerate.

Place chocolate in a heatproof bowl. In a small saucepan bring 1/2 cup of the whipping cream to a boil. Pour the cream over the chocolate and cover for one minute. Stir until the chocolate and cream are blended. If the chocolate mixture isn’t smooth, reheat it it over low heat until smooth. Set aside.

Whip 1/3 cup of the whipping cream until it forms peaks. Add the softened butter and peanut butter and mix until smooth. Sift in powdered sugar and mix to combine. Stir in peanut butter cup and peanuts.

Take the crust out of the fridge. Spoon the filling into the crust, making sure the filling is very smooth on top. Pour cooled chocolate mixture over the filling and gently spread over the top. Refrigerate until the chocolate is hardened, about an hour.

Garnish with whipped cream, flaky salt, crushed peanuts, or chopped peanut butter cups.

Stains and Cookies

I got my first stain. We were piping out cinnamon cookies (to be filled with jam and dipped in chocolate), and the end of the piping bag brushed against my new white coat. It felt a bit like a culinary right of passage. Also, when I washed my coat it turned from a stiff and uncomfortable straightjacket to something Chef C describes as a “nice comfy pair of pajamas”. The hat, on the other hand, creates a scratchy line across my forehead that is rivaled only by the annoyance of my thermometer’s battery constantly falling out. Besides these, there are no constant annoyances, just the typical quirks of a crowded kitchen.

My main instructors are Chef C, Chef F, and Chef A. Chef C is the instructor this quarter for baking 101. We learn about the basic chemistry and theory of baking, as well as flavor combinations and the occasional chocolate tasting. I also had my first rotation on cookies with Chef C. We made some cool cookies, like apricot pistachio pockets, espresso cookies, and chocolate coconut cookies. The best part is that we are practically required to taste everything we make. Often other students will share tastes of their creations. Everybody was hovering around the boy next to us as he pulled out four sheet trays of fresh, fragrant bacon. Chef C is funny, and manages to make more obscure references to Moulin Rouge! than most fortysomething-year-old men could. If there’s something I’m coming to realize, it’s that pastry chefs aren’t like other people; they’re much cooler.

Chef F is in charge of all things French. Tarts, certain cakes and chocolates, and some cookies are his domain. As I was piping out macaroons he told me “I don’t do cookies”, but he will happily order a student to make some madeleines or French macarons. He tries to come across as a strict and unsmiling French pastry chef of the old style, but will offer helpful advice if he notices a student having trouble. He showed some of my classmates how to create some beautiful tarts I thought only a more advanced student could make, and I am looking forward to my rotation with him. He can turn out the most beautiful crust you’ve ever seen, from hunk of dough to perfectly crimped shell, in about three minutes. However, he condemns all rustic tarts as an excuse for laziness, saying they usually “look like crap”.

The Bakeshop

Chef A is the strangest of all the instructors in pastry. He is master of all things fermented, from breads to pickles to charcuterie to cheese. We even have a dedicated cheese room in the bakeshop, and next quarter will learn to make some soft cheeses as well as curing our own meat. In the summer we can, which will be a fun thing in such a big kitchen. The bread section of the bakeshop is set slightly apart from the pastry side of it. I will be able to say more after my dough rotation starting next week, but from what I’ve heard and seen it is hard work. I will be covered in flour, with sticky dough streaks reaching halfway up my arms. They turn out some beautiful breads, including some of the only baguettes I’ve had in the city that rival those in France. Chef A undoubtedly has a lot to teach, as soon as he can tear himself away from his beautifully aging cheeses and, what one classmate calls, the “gooey Mother levain” of his sourdough breads.

Other than my pastry instructors I have Chef N, who teaches basic culinary skills, Chef G, who teaches sustainability, and S, who teaches sanitation. We are working on knife skills right now with Chef N, and have learned the best way to hold a knife, cut, and how to properly dice, julienne and otherwise cut onions, carrots, and potatoes. We cut onions last, and almost the whole class looked like they had just heard the worst news of their life. Only one other girl and I were saved by our contacts. It is easy to see while working how many culinary skills apply to pastry.

S’s class is the most terrifying class I have ever taken. You leave convinced there are parasites lurking in every corner, and it takes several hours to comfortably enter a public restroom. S mentions diarrhea at least twenty times every class, and delves into the deepest detail of nearly every food borne illness there is. She likes to say how she has seen more blood working at a culinary school than in a hospital, which may be true. However scary the information she gives us is, S doesn’t overdramatize or exaggerate. She has a relatively practical outlook on food safety, which may be the scariest thing of all.

Lunch Menu

Every day the second quarter culinary students cook everybody lunch. There are always at least six options and the pastry students put out any of their failed creations that are still edible. The students on duty at our restaurants also bring back any partially eaten plates of food, and everybody picks at what looks tasty. I’ve learned some useful tips from more advanced students at lunch, and met some interesting people. Of course, I am happy that it’s just culinary students that have to work in the dish pit, where all the dining room, lunch room, and culinary dishes are sent. We do our own dishes in the bakeshop and don’t have to suffer through days of steaming dishwashers and slippery floors.

I am becoming one of those people who starts yawning and watching the clock at about seven, just waiting until it’s bedtime. I learn new, crazy awesome pastry secrets and tips every day. I will share those with you that I am allowed to share. We creators of confections must keep some secrets to ourselves. For now, I will share the delicious recipe for chocolate coconut cookies from my enormous binder of recipes.


DARK CHOCOLATE COCONUT COOKIES

Makes two dozen

Oven temperature: 350°F

Ingredients:
One pound softened, unsalted butter
3 cups/20 ounces sugar
4 eggs
Scant 2/3 cup/4 ounces dark cocoa powder
3 cups/20 ounces all purpose flour
1/2 teaspoon baking powder
Big pinch salt
2 cups/13 ounces chocolate chips
1 loosely packed cup/6 ounces unsweetened coconut or macaroon coconut

Mix together flour, baking powder, and salt. In a separate bowl, cream butter and sugar until combined. Add eggs and beat until combined. Slowly add in cocoa powder. Add flour mixture until combined. Add coconut and chocolate chips until spread throughout the cookie dough.

Scoop cookies to about the size of a golf ball, 2 to 3 inches apart on baking sheets covered with parchment. Make sure cookies are relatively similar in size. Slightly flatten the tops. Bake in a convection oven about 10 to 12 minutes, or a standard oven 14 to 17 minutes. The cookies should be slightly squishy, and can still be a little shiny on top. Remove from sheets once cooled. The cookies should be slightly chewy and dense on the inside.

Notes:
-The uncooked cookie dough refrigerates well. Covered, formed cookies can be refrigerated for at least three days and baked straight from the fridge.
-An additional cup or two of other ingredients such as chopped nuts or more coconut or chocolate chips can be easily added along with the stated add-ins. Up to a tablespoon of liquor can be added as well. Be careful though because flavors of alcohol become intensified over time and with baking.

One Hundred Jars


I love to make desserts. I feel more accomplished putting the finishing touch on a beautiful tart or churning out the most scoopable ice cream than finishing the New York Times crossword. Then, of course, there’s a dessert to eat after all the hard work. I’ve found cookies tend to taste better than newspaper. While baking is what I will write about most here, canning is another pastime of mine. Now that summer’s squishy plums and overabundant zucchini keep appearing, there are plenty of exciting recipes to try out. I recently made about one hundred jars, from plum preserves to nectarine salsa to jalapeño hot sauce. However, the one that I’ve already gotten several requests for is dilly beans.

Dilly beans are green beans pickled in a similar way to dill pickles. This recipe is adapted from Ball’s Complete Book of Home Preserving. I won’t cover the principles of canning now, but I will post a guide to canning later on. Ball’s book gives a good basic introduction to canning, but it’s also possible to make the dilly beans in jars, skip the canning, and store them in the refrigerator. You’ll have to eat them more quickly, but that shouldn’t be a problem at all.

The Fool


Dilly Beans

Makes about six pint jars

Ingredients:

3 tablespoons salt
3 cups white or apple cider vinegar (5% acidity)
3 cups water
5 1/2 pounds green beans or yellow wax beans, trimmed to fit in jars
3 small bell peppers, seeded and sliced in strips

Per jar:
1/2 teaspoon black peppercorns
1/2 teaspoon dill seed or one sprig of fresh dill
1 clove garlic

Recipe:

1. Prepare canner, jars, and lids.
2. In a large stainless steel pot combine the salt, vinegar, and water. Boil and stir until the salt dissolves. Add the beans and bell peppers and return to a boil. Once the vegetables have softened, turn off the heat.
3. Pack each jar with peppercorns, dill, and garlic. Pack the beans and bell peppers into each jar, leaving about 3/4 inch of space at the top. Ladle the vinegar brine into each jar to cover the vegetables, leaving 1/2 inch of headspace at the top.
4. If canning, remove the air bubbles and add more brine if necessary to maintain 1/2 inch headspace. Wipe the rim of the jar.
5. Place lid on jar and screw on lid.
6. Place jars in canner with at least one inch of rapidly boiling water and replace lid of canner. After water is rapidly boiling, process jars for 10 minutes. Remove the lid of the canner and let jars sit for 5 minutes. Remove jars from the water and place them in a safe place, undisturbed, for 12 to 24 hours. Store sealed jars in a cool place.

Busy canning. Be back soon.

I’ll get back to all of you once I finish up my canning.